How to Make Custom Resin Keychains?
Table of Contents
“That’d make a ripper birthday gift” or “I could totally sell those at the markets”? You’re not alone. In this guide, how to make custom resin keychains?, we’ll break down everything you need to get started—from picking your gear to making them look schmick enough to sell.
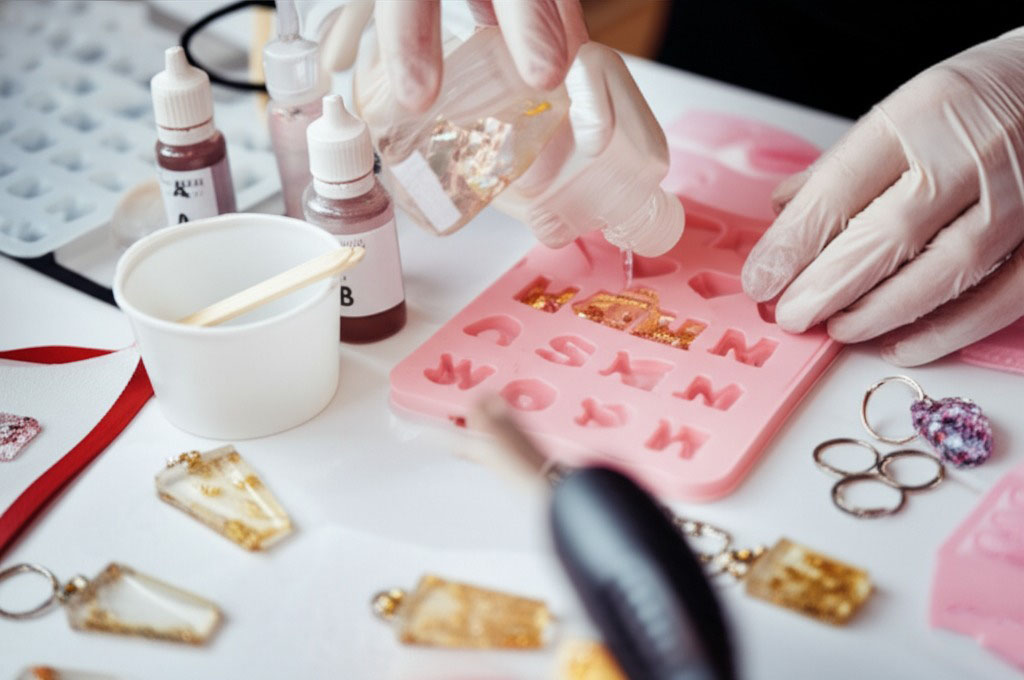
Resin keychains are a top choice for crafty types because they’re affordable, personal, and let your creative side run wild. Think of them like mini canvases where you can trap glitter, dried flowers, or someone’s initials forever. Aussie maker Tash O’Connell reckons, “Once you start pouring resin, you’ll be hooked faster than a barra on the Daly.”
We’ll keep things simple and straight to the point. You’ll learn what to buy, how to pour without bubbles, and the tricks for getting a clean finish—plus how to turn your hobby into a cheeky side hustle. Let’s dive in.
Resin keychain supplies list
Before you even pop open a resin bottle, you’ll want your tools sorted. This cluster breaks down everything you need to kick off your keychain-making journey stress-free.
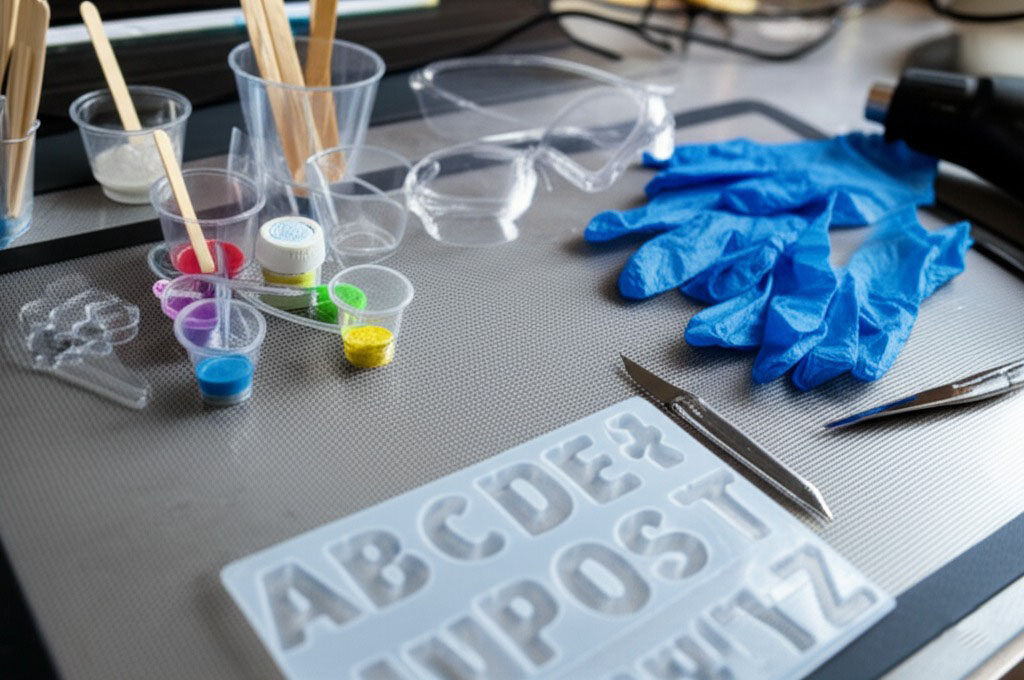
Basic tools for beginner resin kits
Getting into resin crafting doesn’t mean raiding Bunnings top to bottom. Start simple:
Mixing cups – Use clear, graduated ones for precise pours.
Stir sticks – Wooden or silicone, just don’t reuse without cleaning.
Measuring spoons – Great for pigments and additives.
Protective gloves – Nitrile’s your best bet—no latex reaction worries.
Safety glasses – Eye protection = no regrets.
Silicone mat – Saves your table from sticky chaos.
Resin molds – Flexible and reusable—letters, shapes, initials.
Pipettes – Ideal for tiny drops of dye or alcohol ink.
Craft knife – For trimming flash or overflow after curing.
Heat gun – Banisher of bubbles, hero of smooth surfaces.
Where to buy silicone molds in Australia
Finding quality molds locally isn’t hard if you know where to look. Here are a few top picks:
Online stores like Etsy or Amazon AU stock an endless range—from alphabet letters to Aussie flora shapes.
Craft shops such as Spotlight and Lincraft carry basic sets.
Art supply stores like Eckersley’s are great for niche or pro-grade silicone molds.
Marketplace websites such as eBay or Catch often have budget bundles.
Resin suppliers like Just Resin or Barnes Products are ideal for high-quality, Aussie-made molds.
"Support your local hobby shop when you can—plus you get to see the mold quality firsthand!"
Must-have extras: gloves, cups, stirrers
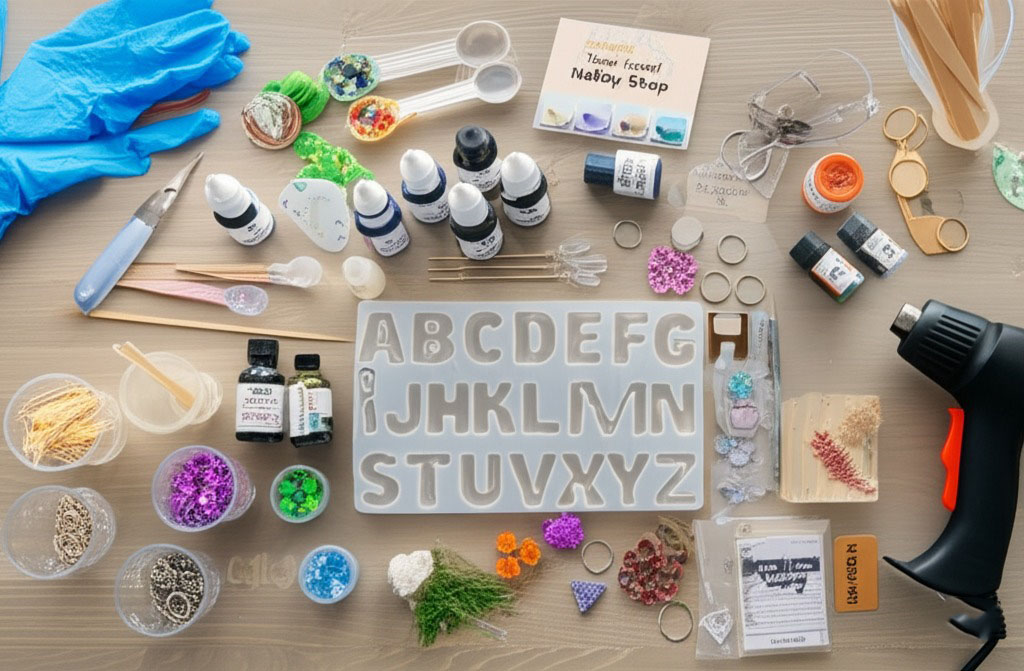
Let’s be honest—no one wants sticky hands or dodgy results. Here’s a quick round-up of the extras that often get forgotten but make all the difference:
Nitrile gloves – Essential for handling resin safely without tearing mid-use.
Disposable cups – Great for single-use batches or layering colours.
Wooden stirrers – Cheap and easy to toss after each pour.
Silicone stirrers – Reusable and perfect for zero-waste setups.
Dust masks – Crucial if you’re sanding or working with fine pigments.
Work surface covers – Think old baking mats or wax paper—your future self will thank you.
Safety goggles & aprons – Look a bit mad-scientist, but saves your clothes and your eyes.
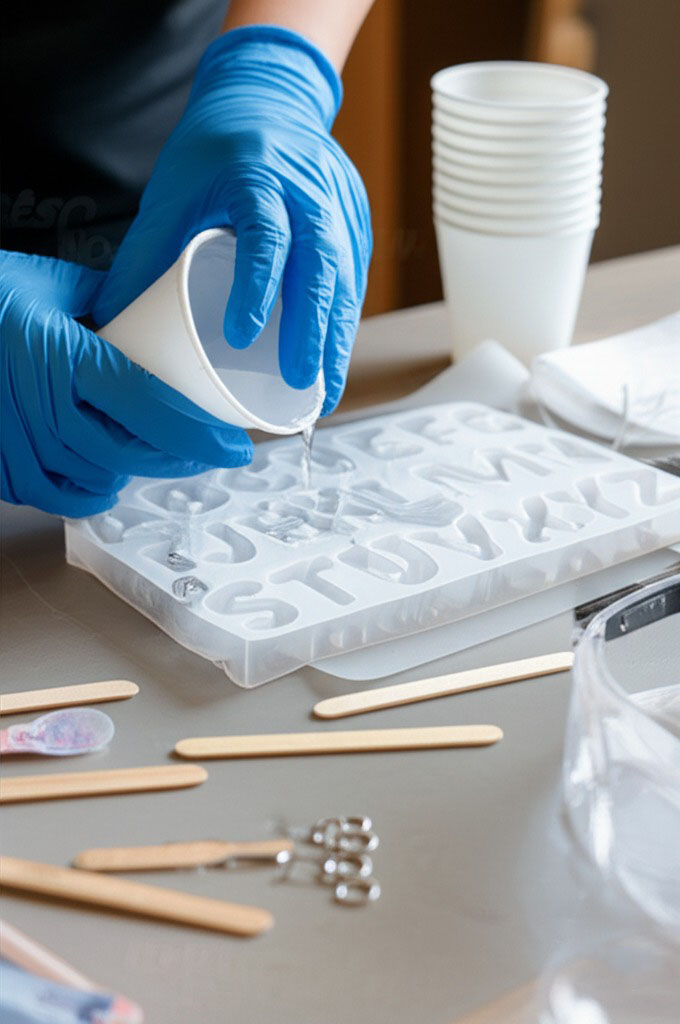
“Don’t skimp on safety. Resin’s brilliant fun, but you’ve got to respect the mess,” says resin artist Chloe Danvers from Melbourne. 🧤🧪
Epoxy resin comparison
Choosing the right resin is key to getting a clean, bubble-free result. Here’s a breakdown of how resin types stack up, especially if you're crafting in Australia.
Fast-curing vs. slow-curing resin types
Fast-curing resin sets quickly—great for speed, but you’ve got less working time. Slow-curing types offer longer pot life and reduce the risk of bubbles. Quick compare:
| Type | Pot Life (mins) | Cure Time (hrs) | Best For |
|---|---|---|---|
| Fast-curing epoxy | 5–10 | 4–8 | Quick keychains |
| Slow-curing epoxy | 30–45 | 24–72 | Deep pours, fewer bubbles |
| UV resin | Instant | <0.5 (with UV) | Small molds, details |
Tip: Use slow-curing epoxy resin when embedding larger decorations like flowers or decals.
Resin toxicity and safe usage indoors
Handling resin safely indoors means being switched on. These substances can kick up fumes and irritate your skin, so don’t muck around.
Always work with good ventilation—a fan near an open window does wonders.
Chuck on PPE like gloves and a respirator (not just a dust mask).
Avoid skin contact and wear long sleeves—epoxy on skin’s no joke.
Keep resin away from pets, food areas, and small kids.
As chemist Sarah Nielson notes, “Even low-odour resins can release vapours that build up indoors. A proper mask is worth every dollar.”
Resin brand options available in Australia
Australia's got a solid mix of local and imported resin brands for crafting. You don’t have to order overseas to get quality:
Just Resin (VIC): Popular for art and jewellery-grade epoxy resin.
Aussie Resin Supplies: Sells UV resin and colour pigments.
Barnes: Trusted source for both casting resin and moulding tools.
Officeworks & Spotlight: Easy pickups for beginners, though selection can be basic.
Search "epoxy resin Australia" or visit local craft supplies stores—they often have bundle deals.
UV resin vs. two-part epoxy
UV resin cures under light—perfect for small, shallow keychains.
Two-part epoxy needs mixing and takes longer, but it’s better for deep pours.
Mixing Ratio: UV resin doesn’t require any mixing, while two-part epoxy is usually 1:1 or 2:1.
Durability: Two-part epoxy wins for long-lasting, scratch-resistant finishes.
Clarity: UV resin cures crystal clear, but can yellow faster over time.
Use UV for quickies and epoxy for pieces that need more strength or thickness.
Popular keychain mold styles
“I never expected something as small as a mold shape to impact customer interest so much,” says Rachel N., a Brisbane-based resin artist whose custom alphabet keychains often sell out within hours at local markets. Shapes are more than decoration—they speak directly to the buyer’s personality.
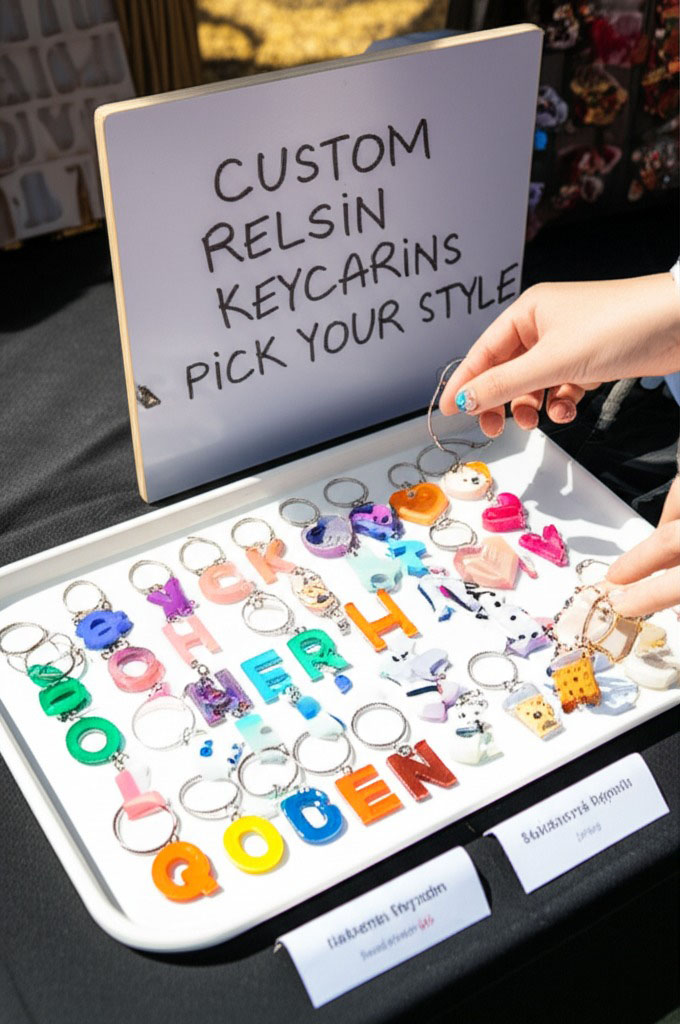
From flower petals to cartoon pandas, the variety of resin keychain molds is massive:
Alphabet molds remain the bestseller for personalisation. Many Etsy sellers report over 50% of their keychain orders include initials or full names.
Geometric and heart shapes offer a minimal, modern aesthetic. These are often chosen by younger buyers or for couple gifts.
Animal and cartoon molds appeal strongly to younger demographics or fans of kawaii culture.
Shaker-style molds—hollow molds filled with glitter or mini charms—are trending, thanks to viral TikTok DIY videos.
Food shapes such as ice cream or boba tea icons are especially popular in gift shops and boutique chains.
According to a 2024 trend report from Handmade Australia Journal, resin artists using custom molds see 32% higher engagement on Instagram. Brands such as ArtResin and Let’s Resin have also collaborated with designers to create limited-edition mold sets, winning both customer praise and design awards .
As expert resin designer Tara Kim shared at the Perth Craft Expo, “Choosing the right mold is not just aesthetic—it is business strategy.” Her advice? Start with three diverse styles to test what resonates with your buyers.
Resin mixing guide
Getting the resin mix right is the heart of crafting smooth, clear keychains. Mess it up, and you’ll get tacky finishes or trapped bubbles.
Mixing ratio tips to avoid sticky resin
Sticky resin is a common rookie mistake—and it usually boils down to dodgy proportions or lazy mixing. Always use digital scales for accuracy and mix resin and hardener by weight, not volume, unless your brand says otherwise. If you're eyeballing it, you’re asking for trouble.
Use a 1:1 or 2:1 mixing ratio, depending on the epoxy type.
Don’t guess—measure with precision using a scale.
Mix slowly but thoroughly for at least 3 minutes.
Room temperature matters too: cold temps = slower cure time and higher stickiness risk.
“If your resin’s still tacky after 24 hours, it’s likely a ratio or mixing problem,” says Angela Downs, founder of ResinLab Studios in Melbourne.
How to remove bubbles in resin
Bubbles are the enemy of a clean pour, but they’re easy to manage with the right tools and technique. Here’s how to keep your pour clear:
1. Stir Gently: Aggressive stirring traps air. Use a slow, steady motion.
2. Let It Sit: After mixing, let the resin rest for 2–3 minutes. This lets bubbles rise to the top.
3. Pop the Bubbles: Use a heat gun, torch, or even a BBQ lighter to zap bubbles as they appear. Wave it briefly over the surface—don’t scorch it!
4. Advanced Method: For perfect results, try a vacuum chamber or pressure pot to fully degas the mix.
Here's a quick look at tool efficiency:
| Tool | Bubble Removal Rate (%) | Best For |
|---|---|---|
| Heat gun | 85% | Surface bubbles |
| Pressure pot | 98% | Deep-pour or thick molds |
| Toothpick | 30% | Spot corrections |
No one wants a cloudy blob where a name should be—so take the time to get it right!
Custom decoration options
Want to make your resin keychains stand out from the pack? These decoration ideas add real flair—and are dead simple to pull off, too.
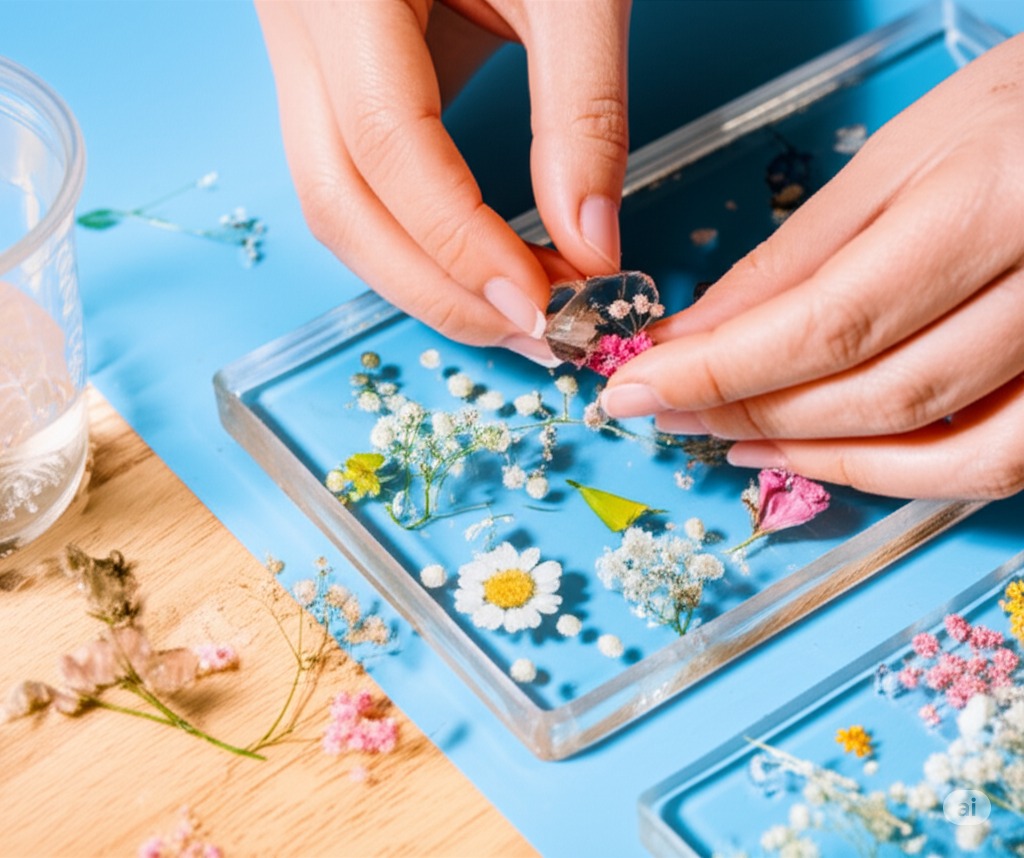
Using dried flowers in resin keychains
Preserve little blooms forever by casting them in clear resin. Using dried flowers adds a lovely botanical vibe that’s trending in epoxy art.
Use small, flat flowers like daisies or baby's breath for best results.
Place carefully into silicone molds before pouring resin.
Avoid moisture—it clouds the resin and ruins the floral preservation.
Expert tip from @FloraCraftAU: “Always dry flowers thoroughly before casting or you’ll get bubbles the size of golf balls.”
Adding glitter and metallic foil
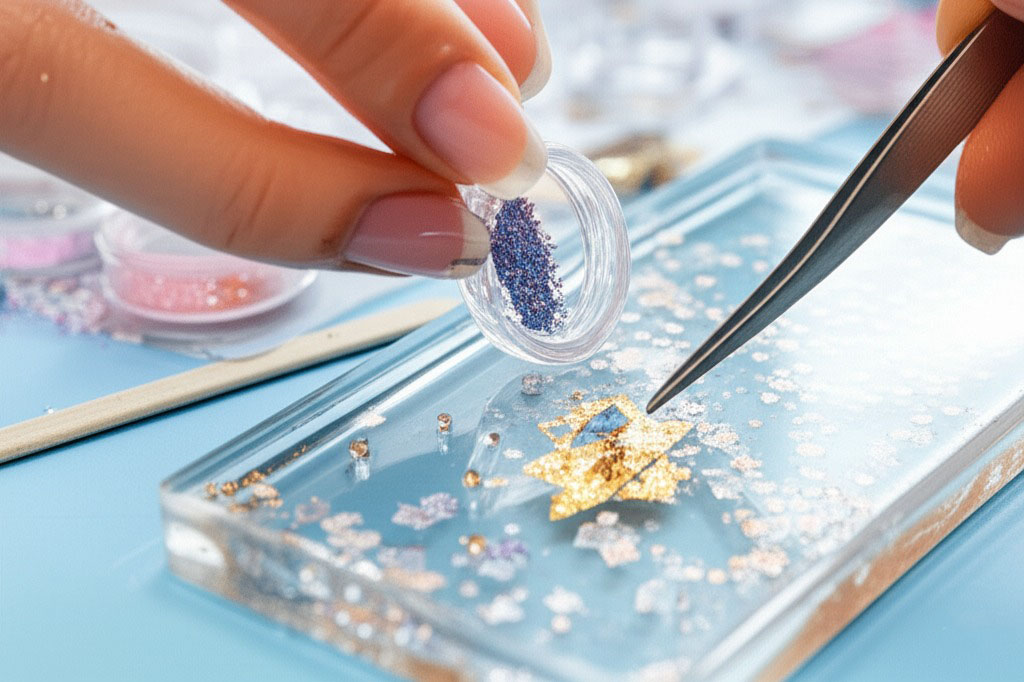
This one’s for the sparkle lovers. Adding glitter or metallic foil gives your resin keychains a shimmer that catches the light (and customers’ eyes).
Pour a base layer of resin.
Add glitter or decorative flakes in thin layers to avoid sinking.
Use metallic foil pieces for a luxe finish.
Mixing chunky and fine glitter together gives a great textured shine—play around and find your style.
Embedding text or initials with decals
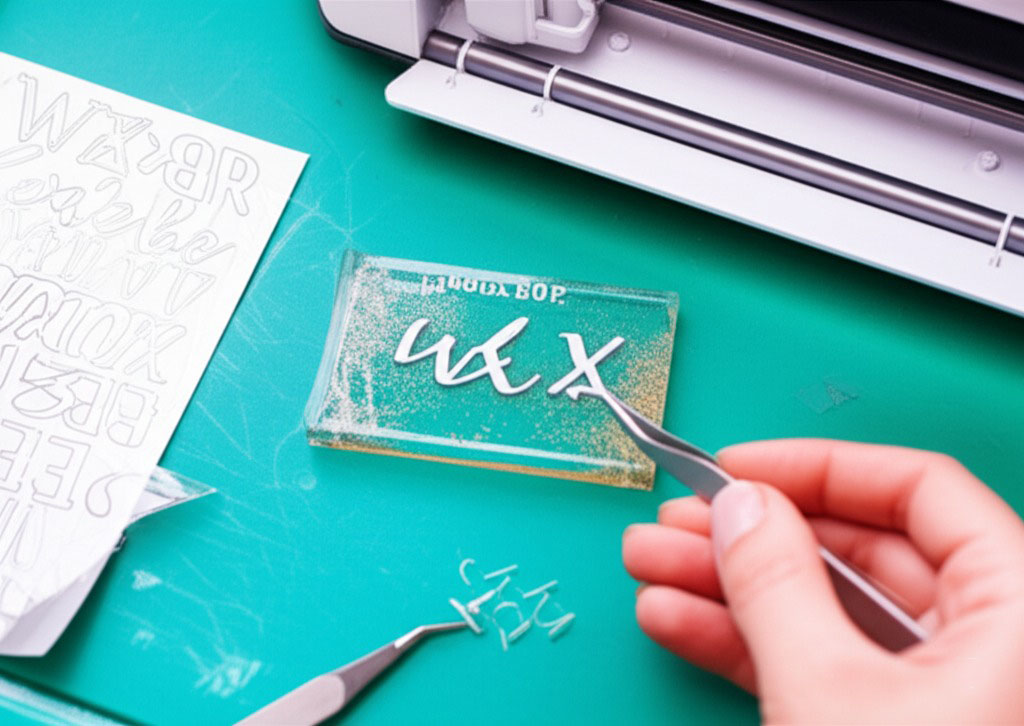
Want to personalise your DIY keychains? Try embedding names or initials using vinyl decals.
Cut text from vinyl sheets or use pre-made stickers.
Apply to cured base layer, then seal with another pour of clear resin.
Works great for wedding favours or branded gifts.
This method turns a standard piece into a keepsake—perfect for those wanting custom gifts.
Glow-in-the-dark pigment use
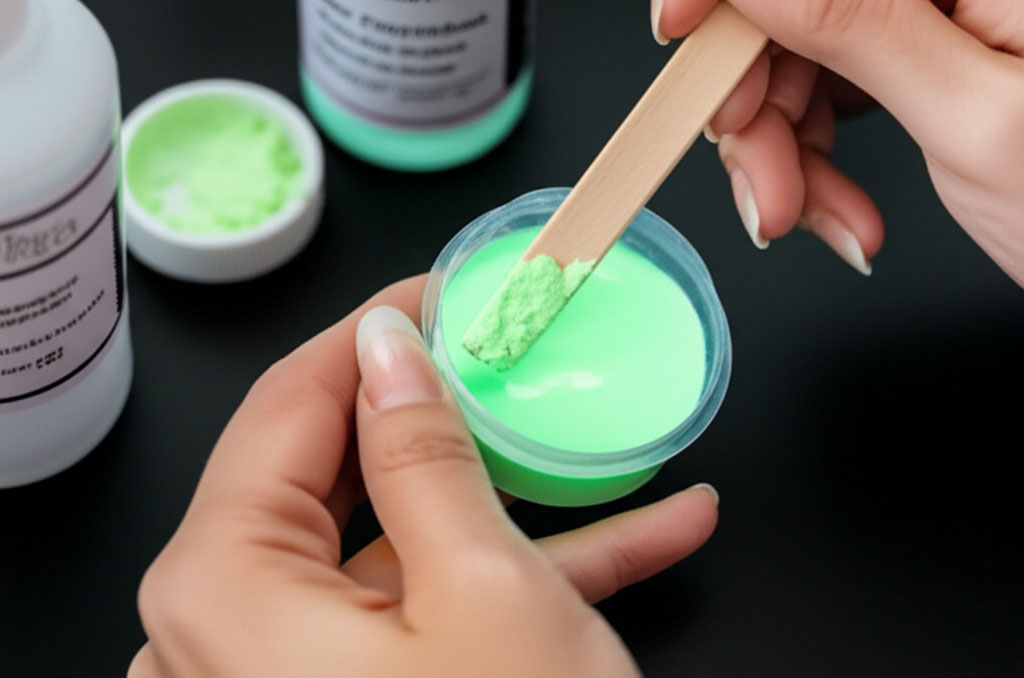
Lend your keychains a bit of mystery with glow-in-the-dark pigments. These phosphorescent powders charge under sunlight and glow at night. ⚡ Tip: Mix pigment into a clear or lightly coloured resin for best effect. ⚠️ Don’t overdo it—too much pigment makes resin gritty.
| Pigment Type | Charge Time | Glow Duration |
|---|---|---|
| Zinc Sulfide | 10 min | 1–2 hrs |
| Strontium Aluminate | 15 min | 6–12 hrs |
Charge your keychains in sunlight for a brighter, longer glow.
Colour mixing with resin dyes
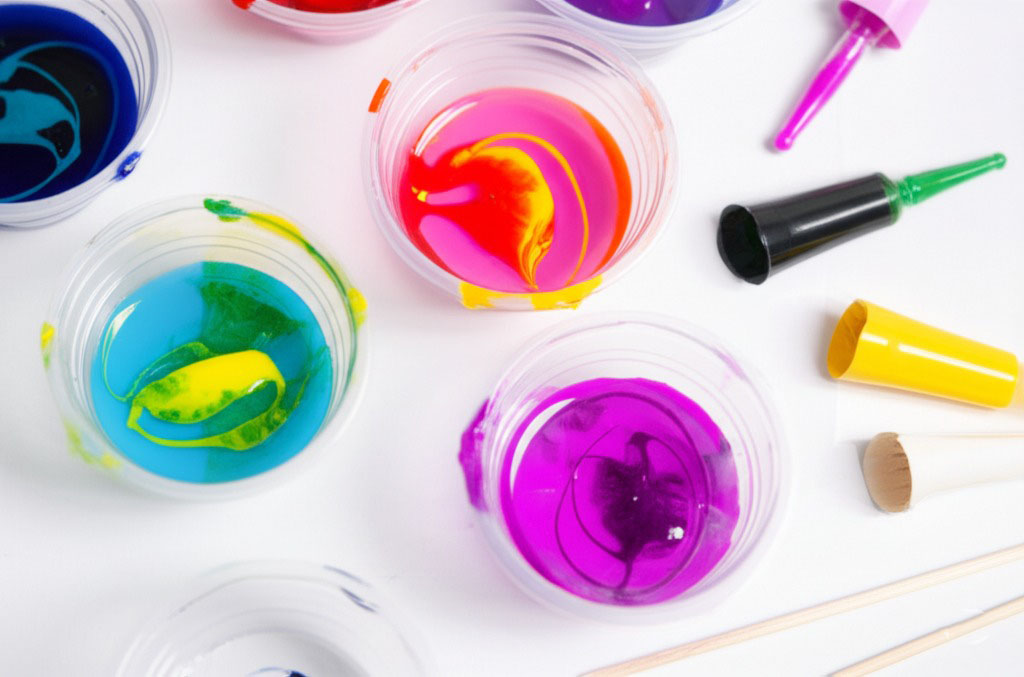
Blending resin dyes takes your colour game to the next level. It’s all about creating vibrant colours that suit your style.
Start with small drops—resin tints are potent.
Mix complementary pigments for rich hues.
Swirl colours while curing for marble-like effects.
Pro move: Layer transparent dyes with opaque ones for awesome depth in your designs.
Resin curing and finishing
Finishing your resin keychain isn’t just about looks—it’s about getting it to cure rock-solid and smooth as a river stone. Here’s how to do it right.
How long resin should cure
Curing time depends on the resin type and your workspace conditions. Epoxy resins often reach a demolding stage in 12–24 hours but take 72 hours for a full cure. UV resin? Quicker, but only under a strong lamp.
| Resin Type | Demold Time (hrs) | Full Cure (hrs) |
|---|---|---|
| Epoxy (2-part) | 18–24 | 72 |
| UV Resin | <1 (with UV) | 1–2 |
Tip: Keep the curing area warm and free from moisture. Layer thickness and humidity can mess with pot life and post-cure quality.
Sanding and polishing resin edges
Want your keychain edges to feel smooth as a cold beer glass on a hot day? Sanding and polishing’s the ticket.
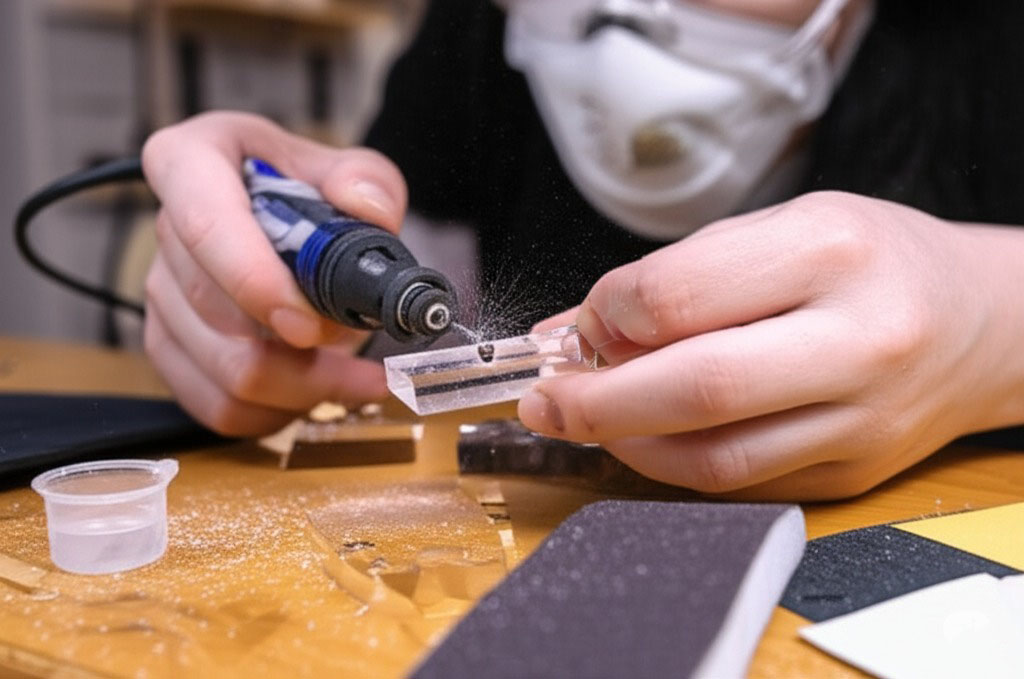
Start with 400-grit wet sanding, working up to 1500 or 2000. Don’t skip grits—it’s like mowing the lawn halfway. Then hit it with a polishing compound and a rotary tool or soft cloth. This gives that pro-level clear finish.
“People judge your product by the feel—rough edges scream amateur,” says craft tutor Narelle Dunn. “Sanding is the real MVP.”
Avoiding sticky finishes and tacky spots
Sticky spots? That’s resin throwing a tantrum—usually due to undercuring or dodgy mixing.
Use accurate ratios: Always follow the manufacturer’s hardener-to-resin instructions. Eyeballing = trouble.
Mind the temps: Resin hates the cold. Ideal room temperature is around 22°C.
Ventilation matters: Trapped humidity causes surface contamination.
Go the full cure: Don’t demold too early. Post-cure heat (like gentle sun exposure) helps harden soft spots.
If all else fails, a thin topcoat of fresh resin often seals the deal—literally.
Keychain hardware installation
Once your resin's cured and looking flash, it’s time to turn that shiny artwork into a real keychain. Here’s how to nail the hardware installation like a pro.
Drilling holes in cured resin
You’ll need a Dremel or rotary tool with a fine drill bit (1–2 mm), plus safety glasses and a dust mask. Use gentle pressure and hold the piece steady. Drip a tiny bit of water or lubricant to reduce heat and prevent cracking. After drilling, a quick sanding and polish gives a clean finish ready for findings.
Choosing the right jump rings
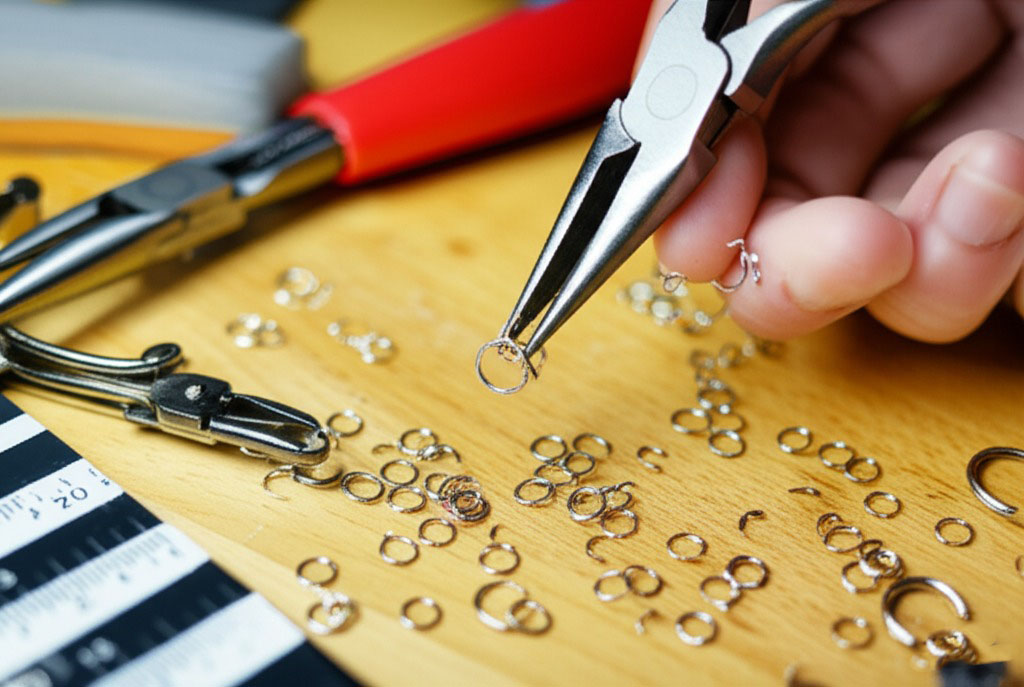
Gauge matters: 18–20 gauge is sturdy enough without being bulky.
Material options: Stainless steel and plated brass are top picks.
Open vs. closed: Use closed rings for high-tug situations.
Size tip: For small charms, 6–8 mm is your sweet spot. Always use flat-nose pliers for opening sideways—not outwards.
Securing eye screws into resin
Start by making a pilot hole with a pin or drill.
Twist in the eye screw by hand or use pliers.
For extra hold, add a dot of epoxy or UV resin. Let it fully cure before attaching anything. Loose screws are a deal-breaker for buyers!
Attaching tassels or charms
It’s all about the flair! To attach tassels or cute charms:
Use jump rings or split rings for flexibility
A lobster clasp gives a swappable option
Hold steady with pliers, then loop through the charm's bail Pro tip: Match metal colours across all findings for a polished finish.
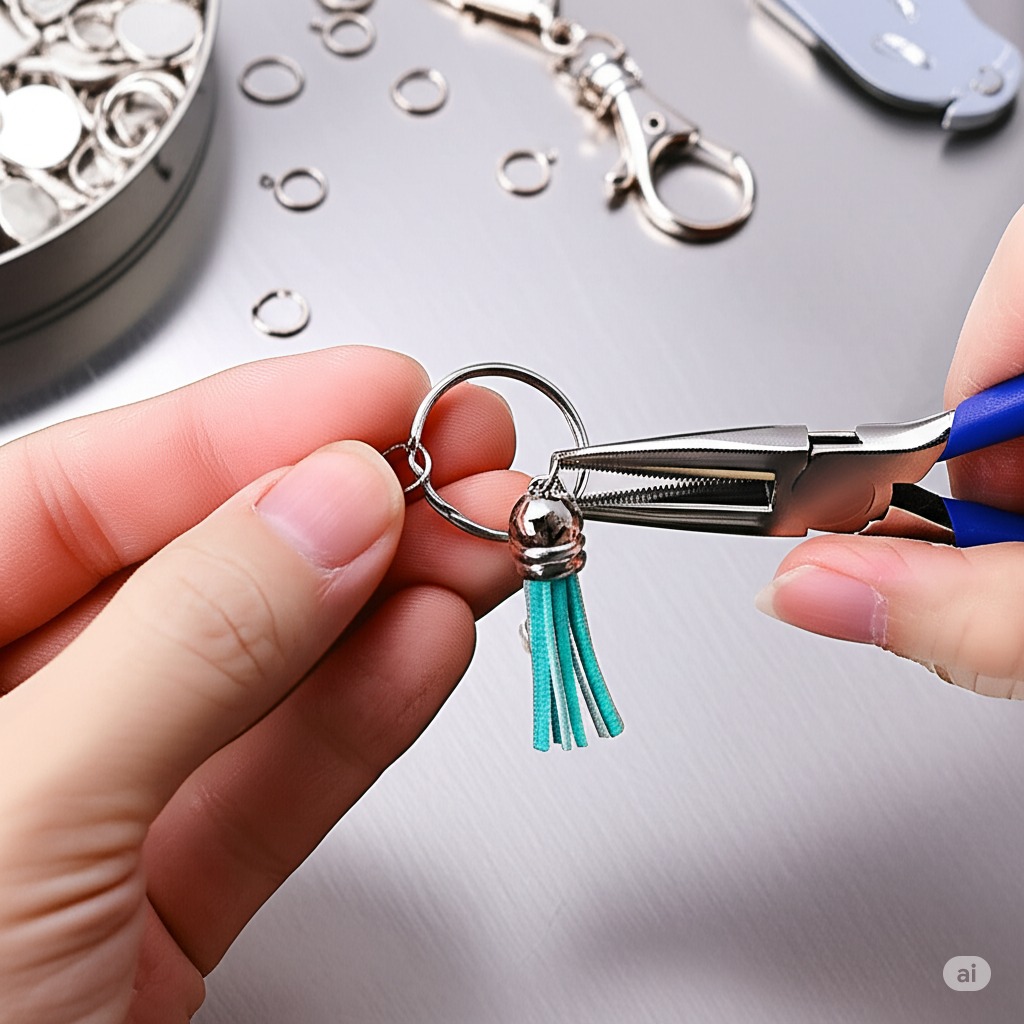
Using split rings vs. lobster clasps
| Feature | Split Rings | Lobster Clasps |
|---|---|---|
| Strength | Very Strong | Moderate |
| Ease of Use | Tricky to Open | Easy Clip-On |
| Best Use | Permanent Fixings | Swappable Charms |
Split rings are ideal for permanent hardware. Lobster clasps work best when the user wants to swap out charms or tassels easily.
Tools needed for hardware setup
You don’t need a full tradie kit, just the right basics:
Pliers (round & flat nose) – must-haves for bending and holding
Wire cutters – for trimming findings cleanly
Crimpers or tweezers – useful for small bits
Safety glasses – when drilling or cutting
Non-slip work mat – keeps everything from rolling away
Custom keychains for sale
“When I started my Etsy shop, I had no clue what would actually sell,” laughs Karen Duong, a Brisbane-based resin artist known for her ocean-themed keychains. “Then one customer messaged me after unboxing, saying her daughter cried happy tears. That kind of feedback shaped my whole process.”
Selling custom keychains online is more than uploading pretty photos. To stand out in a crowded market, your online store needs clear product listings, competitive pricing strategies, and polished packaging ideas that feel like a gift on arrival 🎁. Many successful sellers use kraft boxes, hand-written thank-you notes, and biodegradable fillers to boost buyer trust.
Platforms like an Etsy shop provide built-in traffic, but high performers mix in social media promotion
To build trust, makers often display awards, like "Etsy Star Seller" or include links to verified customer reviews. A clear custom order process, flexible shipping options, and handling wholesale opportunities can attract repeat buyers. Craft fair sales still offer valuable exposure, especially when used to build email lists or generate local buzz.
“Always be real with your audience,” Karen adds. “People buy the story behind the product just as much as the keychain itself.”
Conclusion
You’ve now got the know-how to whip up custom resin keychains that aren’t just pretty—they’re personal. From the mixing tray to the keyring, each step builds something that feels a bit like magic in your hands.
“Start messy, finish proud,” says Aussie resin maker Mel Tran—and she’s spot on. You’ll make mistakes, sure, but that’s half the fun.
For most projects, a clear, two-part epoxy resin is your best bet. Look for one with a medium cure time (around 24 hours) to avoid bubbles and yellowing. UV resin is faster but often less durable and more brittle in larger molds.
Mostly, yes—but size and flexibility matter. Look for molds specifically labelled for epoxy or UV resin, as food-grade silicone molds (like chocolate or ice trays) might not release the resin properly or could warp over time.
Warm your resin slightly before mixing
Stir slowly to avoid whipping air in
Use a toothpick or heat gun to pop surface bubbles
Pour in thin layers to control bubble rise
Just make sure items are dry and sealed so they don’t react with the resin.
Dried flowers or leaves
Tiny photos or printed messages
Glitter, sequins, confetti
Small charms, shells, or beads
This depends on the resin type, but most two-part epoxies need:
Humidity and temperature also play a role. Don’t rush it—it’s worth the wait for a proper finish.
12–24 hours for a soft cure
48–72 hours for a full, hard finish
Absolutely! If your keychain has rough edges or dust, you can sand it down using fine-grit sandpaper. Follow up with a polishing compound or resin gloss coat for that smooth-as-glass look.
Like any chemical craft, a bit of care goes a long way.
Work in a well-ventilated area
Wear gloves and avoid skin contact
Keep pets and kids away from your workspace
Follow the product’s safety data sheet
You’ll need a small drill, eye screws or pins, and jump rings. After the resin cures, carefully drill a pilot hole, insert your screw, and then attach the key ring or clasp using pliers. Once you get the hang of it, it's pretty quick.
It’s not just about being creative—it’s about protecting your work and your buyers.
Use safe, non-toxic resin (check SDS sheets)
Get public liability insurance if selling at markets
Consider registering your hobby as a business if you earn consistently
Package your items professionally with branding and care instructions

Leave a comment