How to Make Custom Acrylic Keychains?
Table of Contents
how to make custom acrylic keychains might just be your next weekend obsession. These little charmers aren’t just cute—they’re big business on Etsy and markets across Aus, with artists and hobbyists turning them into side hustles or personalised gifts.

You don’t need a full-blown workshop or a degree in design to get started. “Acrylic’s one of the easiest materials to work with at home,” says Casey Young, a Brisbane-based maker who’s sold over 2,000 pieces online. With a few tools and a spark of creativity, you can go from doodle to dangling art in no time.
This guide breaks down what they’re made of, how to make them yourself, and where to get them made professionally—so you can skip the guesswork and get cracking.
What Are Acrylic Keychains Made Of?
Learn what goes into these pocket-sized pieces of art—from the base material to the final surface finish.
Types of acrylic used in keychains
Not all acrylic is created equal. Keychains are usually made from Plexiglass, or PMMA, which is a lightweight polymer. You’ll find two main types:
Cast acrylic: Offers richer colours, better laser cutting, and more durability. Perfect for professional-looking charms.
Extruded acrylic: Cheaper and easier to mass-produce, but it scratches easier and can warp under heat.
Manufacturers lean towards cast acrylic for its precision. It’s the go-to for sharp, polished edges and cleaner engraving.

Transparent vs. frosted acrylic styles
Some people love that crystal-clear look, others are after that chill matte vibe. Here's a quick rundown:
| Style | Light Diffusion | Surface Texture |
|---|---|---|
| Transparent | Minimal | Glossy |
| Frosted | High | Matte |
| Opaque Acrylic | None | Smooth/Dull |
Transparent acrylic suits bold, bright designs, while frosted acrylic softens light and hides scratches better.
Resin coating and surface finishes
Adding a resin coating is like giving your keychain a glossy, hard-wearing shield. Think of it as a topcoat for nails—makes things pop and last longer. There are a few options:
UV resin: Quick to cure under UV light and perfect for small-batch projects.
Epoxy resin: Pours thicker, gives a glassy dome finish, but takes longer to dry.
Matte finish topcoats: For those who prefer a smooth, no-shine surface.
DIY or Manufacturer: Which One to Choose?
Thinking about jumping into the acrylic keychain game but unsure if DIY is worth it, or if going pro makes more sense? This section breaks it down for you.
Comparing costs: home-made vs. factory-made
Cost is king—especially if you're on a budget or testing the waters.
DIY Pros: Lower startup for small batches. You control materials cost and labour. Perfect for one-off gifts or market trials.
Factory Production: Better value at scale. Bulk pricing brings individual cost down. You’ll likely pay more upfront, but less per unit.
“For personal batches, DIY wins. But if you're scaling, factory is cheaper long term,” says Toni Carter, founder of CraftLoop Studio.
| Method | Cost per Keychain | Setup Cost (AUD) |
|---|---|---|
| Handmade (DIY) | $2.50–$4.00 | $50–$150 |
| Factory-Made | $1.20–$2.00 | $100–$500 |
Turnaround time and order flexibility
DIY lets you work on your own schedule—no waiting, no stress. But if time is tight or you’ve got an urgent order for 100 keychains? That’s where manufacturers shine.
DIY – Great for flexibility, but time-consuming if you’re solo.
Factory – Offers bulk speed. Many allow rush orders or scheduled drops.
Hybrid Tip – Design at home, outsource production when your workload spikes.
🎯 Pro tip: Some platforms like Vograce offer low minimum order quantity + fast delivery options, making them a great middle ground.
Designing Your Keychain Artwork
This is where your keychain’s personality really shines through.
Best apps to create keychain art
Design apps can make or break your workflow. For clean, scalable designs:
Procreate – great for hand-drawn, layered art on iPad
Adobe Illustrator – best for vector files, a printing must-have
Canva – easy for beginners with free templates
"Vector designs reduce printing headaches," says Sarah Dean, an acrylic product designer in Melbourne. “Clean lines print clean charms.”
Tips for sizing and layout precision
Keep your design tight—literally. Keychains don’t leave much space, so scale matters:
Stick to a 5–7 cm max width
Leave 2 mm padding around the edges
Keep critical text and graphics centered
Don’t forget bleed margins for UV printing
Use mockups to preview proportions before cutting or sending to a manufacturer.
Choosing themes for custom designs
Want your keychains to stand out? Theme it right.
Pop culture mashups (like koalas dressed as anime characters)
Personalised names, horoscopes, or slogans
Aussie nostalgia—think milk bar lollies or retro road signs
You’re not just selling keychains—you’re selling a vibe.
Preparing print-ready digital files
Here’s where many DIYers trip up—files not being print-ready.
Use .PNG or .SVG formats (transparent backgrounds are key)
Set 300 DPI resolution
Convert all text to outlines
Group and flatten layers in design files
| File Type | Transparency | Best Use |
|---|---|---|
| PNG | ✅ Yes | UV printing |
| SVG | ✅ Yes | Laser/Cricut cut |
| JPG | ❌ No | Not recommended |
Getting your files right saves you reprints—and money.
Can I Make Acrylic Keychains Without a Printer?
Absolutely. Not everyone has access to a UV printer or Cricut machine, and that does not mean custom acrylic keychains are off the table. As Hannah Craig, owner of Melbourne-based handmade shop StudioJunkie, puts it, “You can create beautiful designs with nothing more than your hands, some patience, and a few craft tools.”
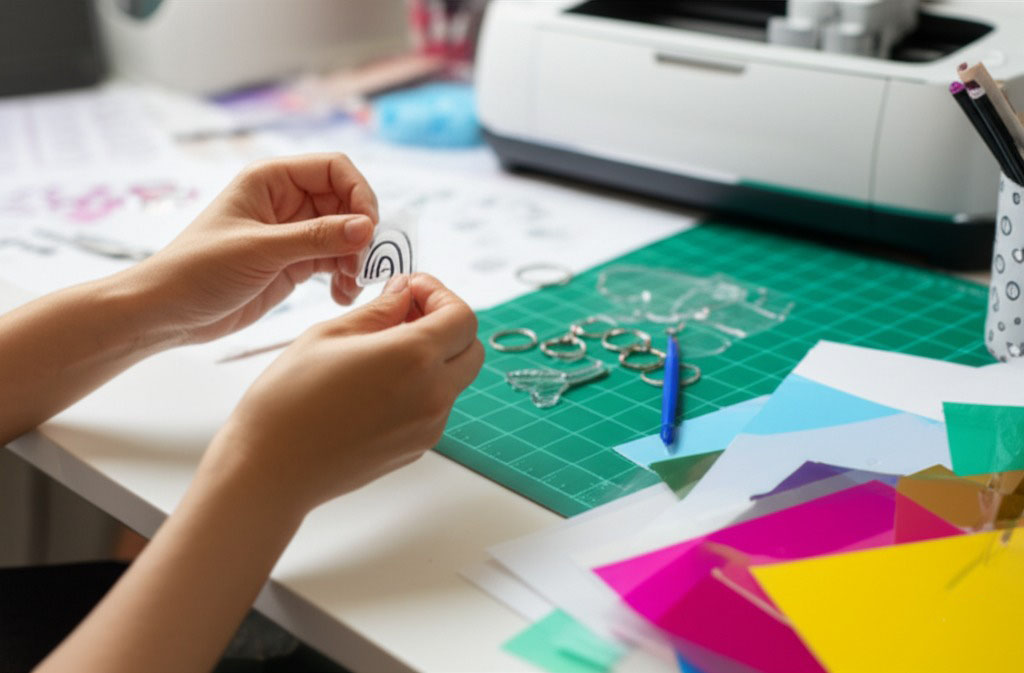
Many hobbyists start with acrylic blanks—pre-cut shapes ready to decorate. Using paint pens, vinyl decals, or manual engraving tools, designs can be added directly onto the blank. A stencil helps guide the artwork for those after clean lines, while glitter and epoxy resin offer that glossy, professional finish seen in store-bought charms.
For texture and visual interest, some makers opt for decoupage—gluing paper or fabric cutouts onto the surface—sealed with resin. Others layer designs with cutting tools, or add color using alcohol inks. Once dry, adding the keychain hardware is the final step.
These handmade pieces often surprise buyers. “Our non-printed charms outsell the printed ones,” says Leanne Harris, a Sydney Etsy seller with over 4,000 sales. “Customers love the imperfections—they feel more real.”
No printer, no problem. Creativity is the only real requirement.
Keychain Making Tools and Supplies
Before you get into the nitty-gritty of making acrylic keychains, you’ll want the right gear. Here’s the lowdown on tools, hardware, and where to grab supplies.
Must-have tools for beginners
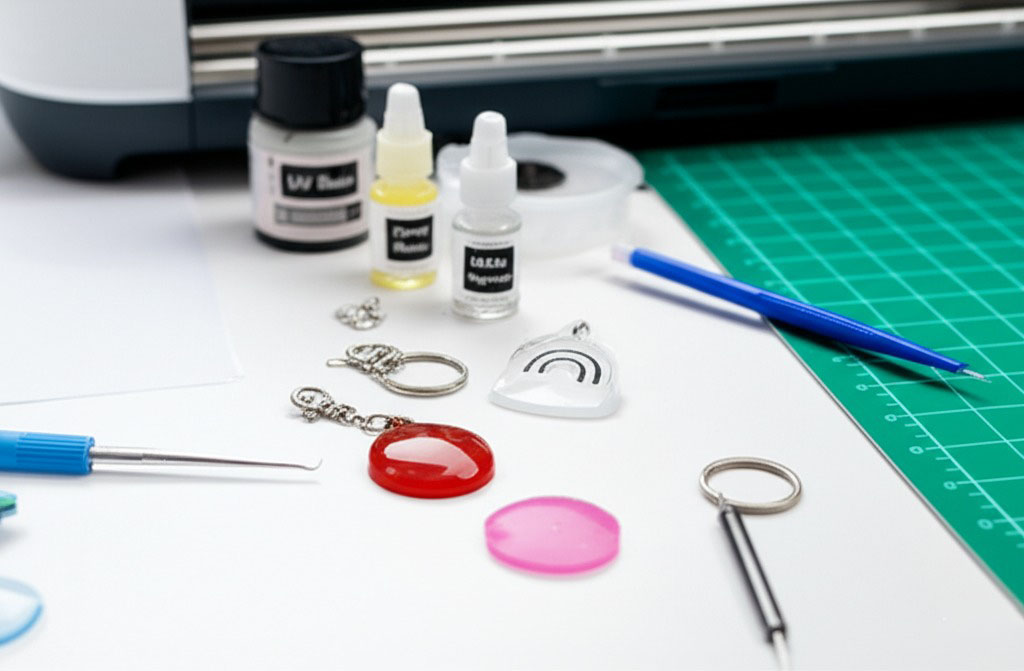
Every good project starts with the basics. Your starter kit should include a craft knife, scissors, glue gun, cutting mat, ruler, pliers, and tweezers. These beginner tools cover everything from cutting acrylic sheets to assembling your finished charm. Don’t worry about going high-end—reliable brands from your local crafting store or Bunnings will do just fine for starting out.
Difference between Cricut and laser cutter
Cricut machine: Best for vinyl, paper, light acrylic; more affordable.
Laser cutter: Ideal for engraving and cutting thicker materials with high precision.
Cost: Cricut is budget-friendly; laser cutters are pricey but powerful.
Software: Cricut uses Design Space; laser cutters support CorelDRAW, Illustrator.
"Laser cutters are game changers for acrylic," says Alex Tran, owner of Sydney’s GlowForge Lab.
Types of cutting mats and blades
Cutting mat: Choose from light grip, standard grip, strong grip, or fabric grip depending on your project.
Blades: Use a rotary blade for fabric, knife blade for tough cuts, and fine-point for details.
Mat size matters—12x12" works for most keychains, but a bigger mat offers more flexibility.
Hardware: key rings, jump rings, chains
Crafting keychains? You’ll need reliable hardware to finish the job. • Key rings: Go for split rings or swivel clasps for secure hold. • Jump rings: Available in different gauges, use open ones for easier assembly. • Chains: Cable or ball chains add flair—buy by the metre for better value.
Where to buy quality crafting supplies
| Supplier Type | Examples | Best For |
|---|---|---|
| Online Stores | Etsy, Amazon AU, CraftOnline | Convenience, variety |
| Local Craft Stores | Spotlight, Riot Art & Craft | Quick buys, in-person advice |
| Wholesale Suppliers | Craft Bulk, Lincraft Wholesale | Business buyers, bulk savings |
Pro tip: Don’t skimp on materials—good crafting supplies make the build easier and the finish cleaner.
Cutting and Assembling the Keychain
Once your acrylic design is ready, it’s time to bring it to life. This section covers the hands-on part: putting holes in the right spots and getting the shine just right.
Drilling holes and attaching hardware
Adding holes to your keychain isn’t just poking plastic—one wrong move and you’ll crack it. Here’s how to do it right:
Choose the right drill bit – Go for a 1.5mm or 2mm acrylic-compatible bit.
Secure the piece – Use a lamp shade frame or small bracket to keep the keychain stable.
Drill slowly – Let the drill do the work—don’t push.
Attach hardware – Grab your jump ring, open it with pliers, and slide in your keychain. Lock it in with a gentle twist.
💬 “If your drill's too fast or your hands too rough, it's game over,” says Jake from MakerMart Sydney.
Removing protective films without scratches
Before showing off that glossy surface, you’ll need to get rid of the protective film. And no—don’t just dig at it with your nail.
Use a gentle tool like a plastic scraper or the edge of a fabric-wrapped card.
If there’s adhesive residue, apply a dab of cleaning solution on a cotton swab and work slowly.
For delicate surfaces like lamp shade material or frosted acrylic, go extra slow and avoid any sharp edge that could gouge or scratch.
Pro tip: Do this step last so your keychain stays flawless through assembly.
Online Platforms to Order Custom Keychains
“People think it is all about design,” says Sophie Tran, a Melbourne-based illustrator who has used custom printing services for over four years, “but honestly, the platform you pick makes or breaks your product.” 🛍️
From Etsy storefronts to print-on-demand platforms like Sticker Mule, the variety of online marketplaces today is staggering. Each one offers a different blend of design tools, bulk pricing, and shipping options—yet the experience can vary wildly. Sophie recalls her first big order through Vistaprint. “The file upload was smooth, colours printed sharp, and they even included a surprise sticker pack. It just felt professional.”

Buyers looking for custom keychains in bulk should compare:
Sticker Mule: Strong on speed and customer support, loved for freebies
Vistaprint
Etsy: Great for finding artist-made styles and smaller batches
Verified platforms often include trust signals—like SSL protection, reviews, and industry awards—that set them apart. Brands like Vistaprint are ISO-certified and regularly listed in PCMag’s Top Print Services.
Conclusion
Had a crack at learning how to make custom acrylic keychains? It’s easier than it looks—and a bit like baking a cake: gather the right stuff, follow the steps, and add your own flair. From sketching your ideas to clicking “order” or firing up your Cricut, you’re all set to turn your design into something real.
“Start small, make it personal, and have a laugh along the way,” says Leah Tran, a Melbourne-based market stall regular.
Cast acrylic is the go-to for most creators. It’s clearer, engraves more cleanly, and holds up better than extruded acrylic. If you’re doing any cutting or printing, cast acrylic gives you that crisp, polished look most pros aim for.
Yes, but with a twist. Cricut machines can cut vinyl or stickers for layering on acrylic blanks, but they don’t cut the acrylic itself. For full-on acrylic cutting, you’ll need a laser cutter. Cricut’s still handy though—for adding names, designs, or shapes.
CraftOnline
Etsy (search for local Aussie sellers)
Officeworks (limited shapes, but handy for beginners)
Local art supply shops or MakerSpaces
Usually, 2mm to 3mm thick acrylic is perfect for durability without adding bulk. Go thicker if you’re after a chunkier, more premium feel.
Acrylic blanks or shrink plastic sheets
Jump rings, pliers, and key rings
A drill or hole punch (depending on material)
Vinyl cutter or printer (if adding graphics)
They’re cute and budget-friendly, but not as tough as acrylic. Over time, shrink plastic can bend or crack if it’s not sealed properly. It’s a great option for kids' crafts or light personal use, though!
Absolutely, but make sure your designs don’t infringe on copyrights or trademarks (like popular characters or logos). Many sellers on Etsy or markets get into hot water over this. Original art? You’re golden.
Use a clear resin coating for gloss and durability
Avoid rough storage (like loose in bags with keys)
Consider double-sided printing or protective films
Store finished pieces in soft pouches before selling

Leave a comment